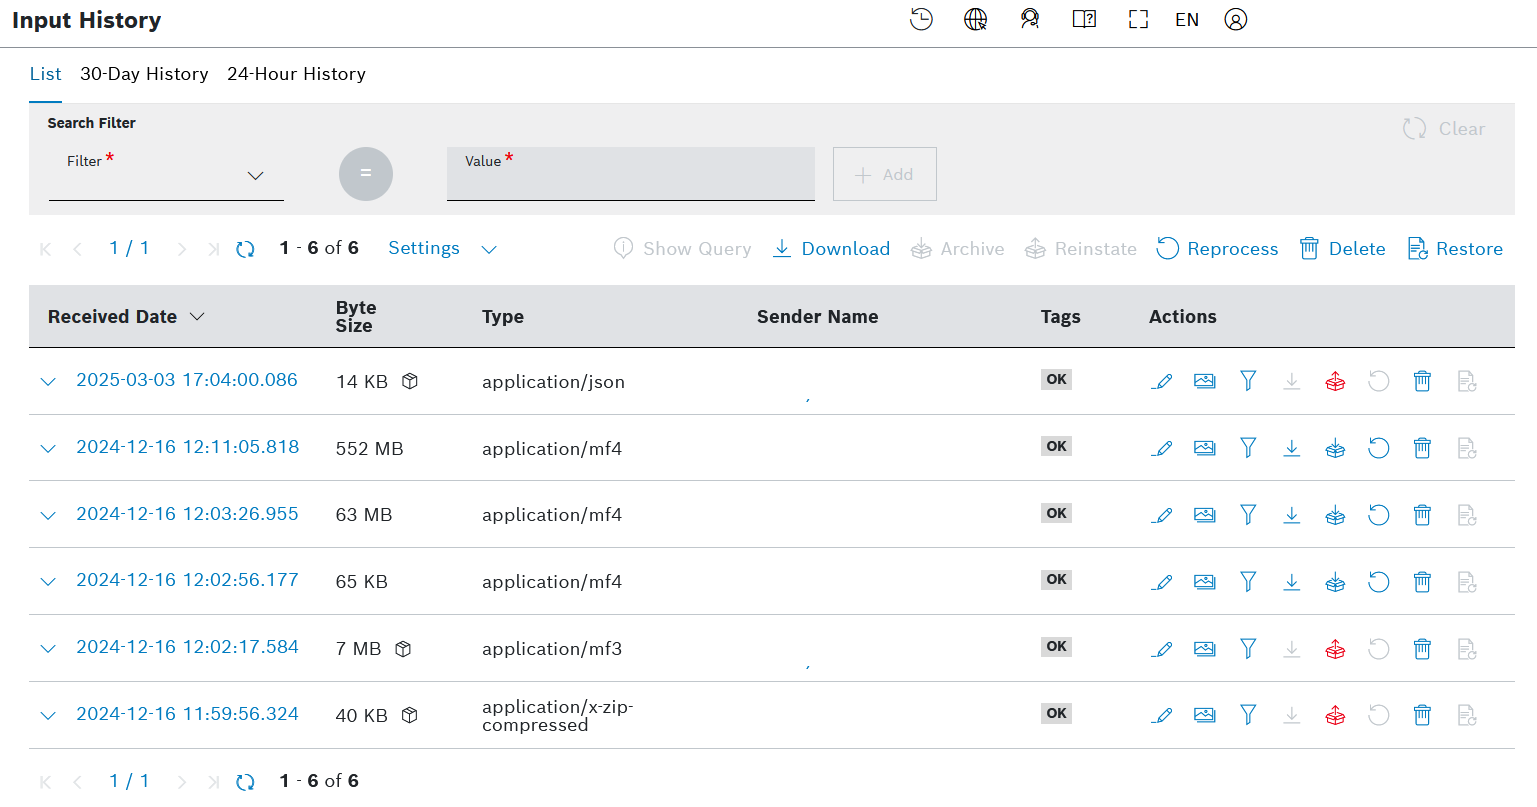
The Input History provides details on the manually uploaded documents and the documents that have been sent with the Data Recorder. The following information is displayed in the table:
- Received date
- Byte size
- Type
- Tags
e.g. OK, duplicated, checksumFailure - Actions
On the side navigation, click Processing and then the Input History menu item to open a list of all input history entries.
This chapter details the following topics:
- Prerequisites
- General functions
- Displaying the details of an input history entry
- Displaying a preview of an input history entry
- Editing the metadata of an input history entry
- Showing the processing information
- Downloading input history entries
- Reprocessing input history entries
- Archiving and reinstating input history entries
- Deleting and restoring input history entries
Prerequisites
A collection or processed data collection must be selected in the filter.
General functions
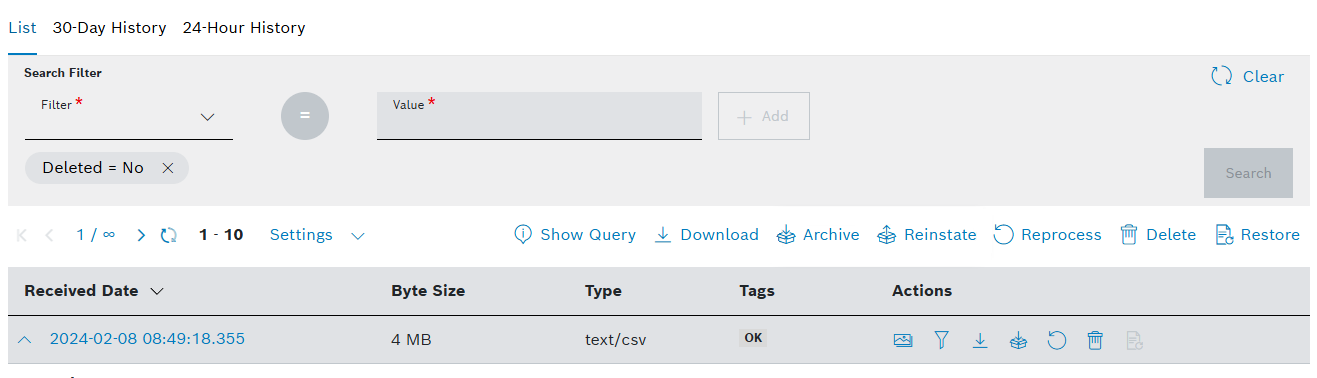
Filtering for input history entries
The following filters can be applied:
- Received Date Range
- Sender Name
- MD5
- Byte Size
- Duplicate
- Metadata Fields
- Checksum Failure
- Sender IP
- Input data ID
- Processed data
- Type
- Device
- Archived
- Deleted
Proceed as follows
- In the Filter drop-down list, select a filter which you want to search through.
- Select an operator, e.g.,
Equals,Greater than, orLess or equal to. The operator is only available for specific filters. For the filter Metadata Fields, enter a Field Name and select a data type, in the Data Type drop-down list, which matches your field.
An incorrect data type selection might lead to unexpected results.
- In the Value field, enter any value you want to search for.
- Click the Add button to add this filter parameter.
→ The filter parameter is added. - Click the Search button to execute the filter parameter.
→ The query is executed. It can be extended with further filter parameters. All created filter parameters can be connected with logical operators, such as AND and/or OR functions. - Add further filter parameters as described in steps 1 to 5, as desired.
→ The Compound Logic Editor is displayed. - Click the button between the filter parameters to switch the connection from an AND to an OR - and vice versa.
Click the Search button to execute the filter parameter.
→ The filter parameter is executed.The Compound Logic Editor can also be extended by using the keyboard, e.g., by adding parentheses.

Paging
Proceed as follows
Use the ![]() and
and ![]() icons to jump to either the first page or the last page of input history entries.
icons to jump to either the first page or the last page of input history entries.
Use the ![]() and
and ![]() icons to go back a page or forward.
icons to go back a page or forward.
Refreshing the input history
Proceed as follows
Click the ![]() icon to refresh the list of input history entries.
icon to refresh the list of input history entries.
Limiting the number of input history entries
Proceed as follows
- Click the Settings drop-down list.
- Select the number of input history entries to be displayed per page.
→ The number of displayed entries per page is adjusted accordingly.
Downloading the input history
All entries in the input history can be downloaded.
Only the uploaded data can be downloaded not the metadata that has been added.
Only the input history entries to which you have access will be downloaded. Access rights can be managed for each device and for each user role, refer to Managing device access rights.
Proceed as follows
- Click the Download button to download all input history entries.
Open or save the file to the desired location.
→ The input history has been downloaded.
Deleting the input history
A user with the Admin user role can delete all entries in the input history, refer to Deleting the input history.
Restoring the input history
A user with the Admin user role can restore all soft-deleted entries in the input history before they are permanently deleted, refer to Deleting the input history.
Reprocessing the input history
A user with the Admin user role can reprocess entries of the input history, refer to Reprocessing the input history.
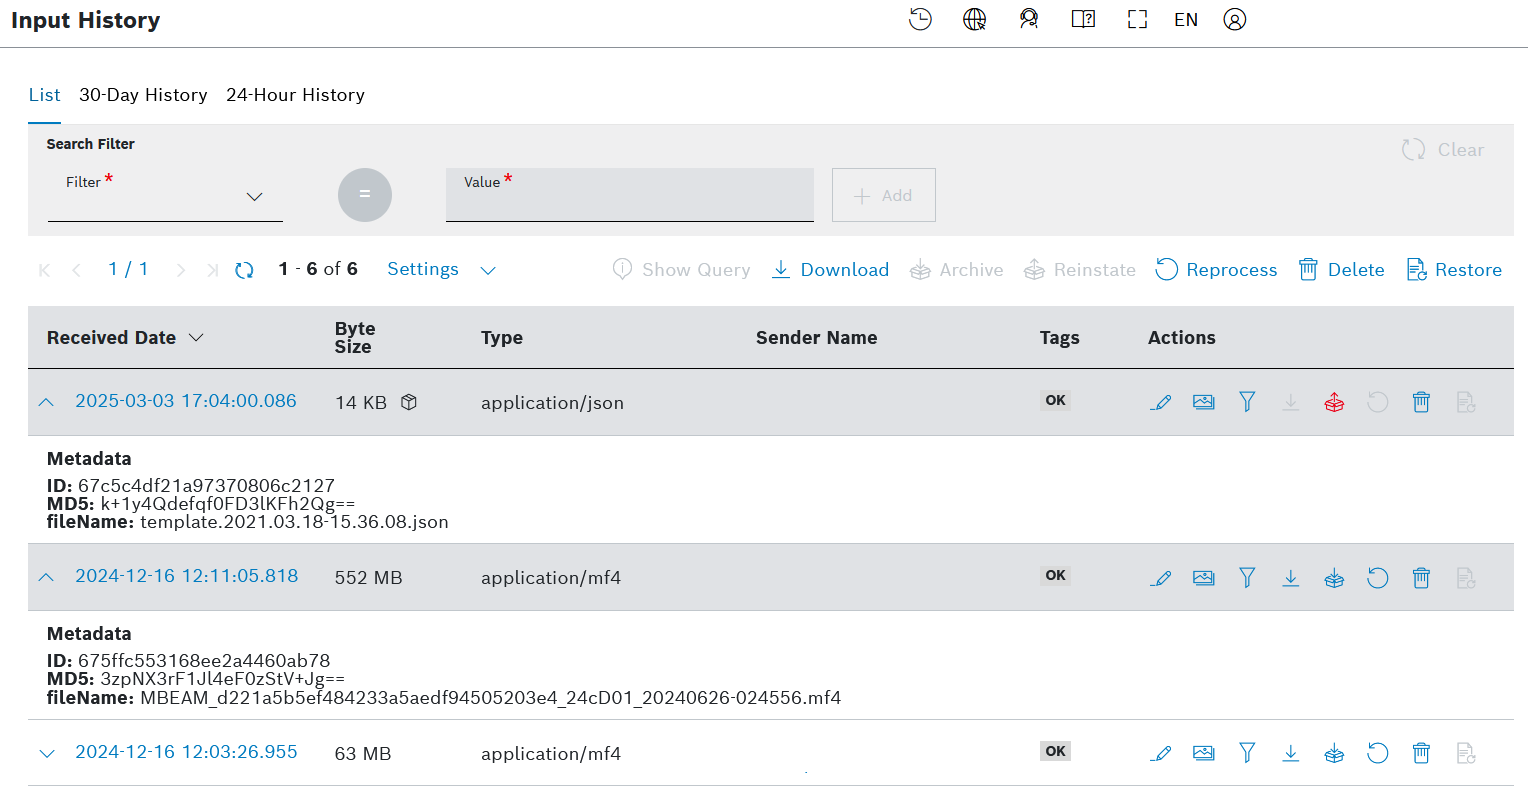
Displaying the details of an input history entry
Each entry in the input history can be expanded for more details, provided it is not deleted.
The following metadata is displayed:
ID
MD5
fileName
All sent metadata is displayed.
Displaying a preview of an input history entry
Each entry in the input history, unless archived, can be directly previewed for more details.
Archived input history entries can also be previewed under the following conditions:
- The archived file is already reinstated by a user with the required role, or
- A user with the Admin role or higher has enabled the reinstate "on access" feature, and the user who attempts the preview has the required role.
These conditions are described in further details in the section Archiving and reinstating input history entries below.
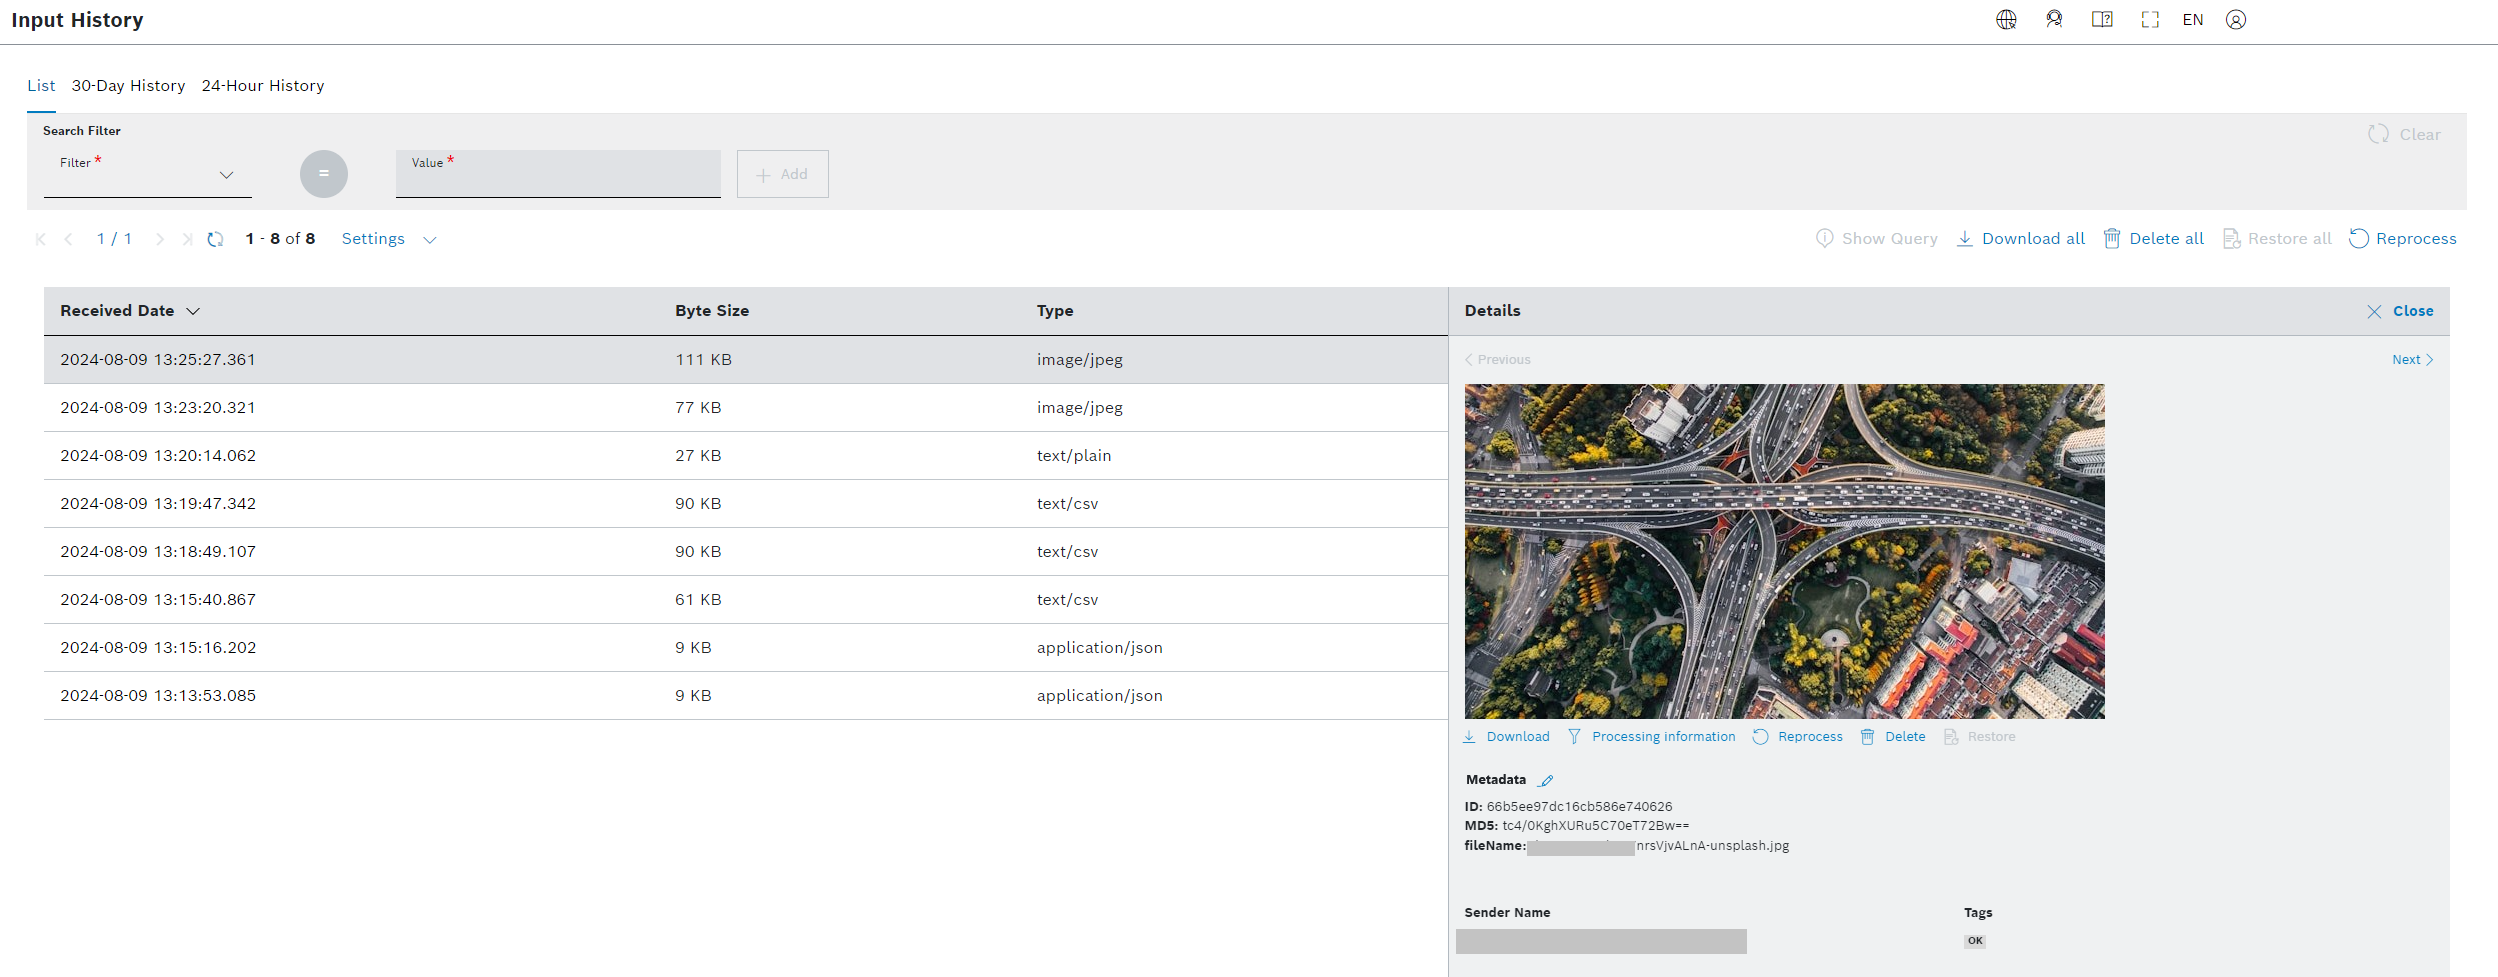
The following information is displayed:
Text/image/application
To download the file, click the Download button.
To view the processing information of the input history entry, click the Processing information button.
To reprocess the input history entry, click the Reprocess button. This action is only available to users with the admin role.
To delete the file, click the Delete button. This action is only available to users with the admin role.
To restore a soft-deleted file, within the period before it is permanently deleted, click the Restore button. This action is only available to users with the admin role.
To zoom in to and out of an image, use the scroll wheel on your mouse.
- MetadataAll sent metadata is displayed.
- Sender Name
- Tags, e.g. OK, duplicate, no-access
Proceed as follows
- Optionally, set a filter to narrow down the list of the displayed input history entries.
Click the Preview icon
 in the line of the input history entry of which the preview shall be displayed.
→ The Details pane is opened.- To navigate through the details of each input history entry, use the Previous and Next buttons.
- To close the details of an input history entry, click the Close button.
Editing the metadata of an input history entry
You can adjust the existing metadata values and add new custom metadata entries even after you have uploaded the input file. By default, this will not trigger a reprocessing job, however, you can also configure the respective processing pipeline to react on metadata upload and to automatically reprocess the data.
The metadata cannot exceed 10Kb.
Proceed as follows:
- Click the
 edit icon on the row of the relevant input history entry.
→ The Edit Metadata dialog opens.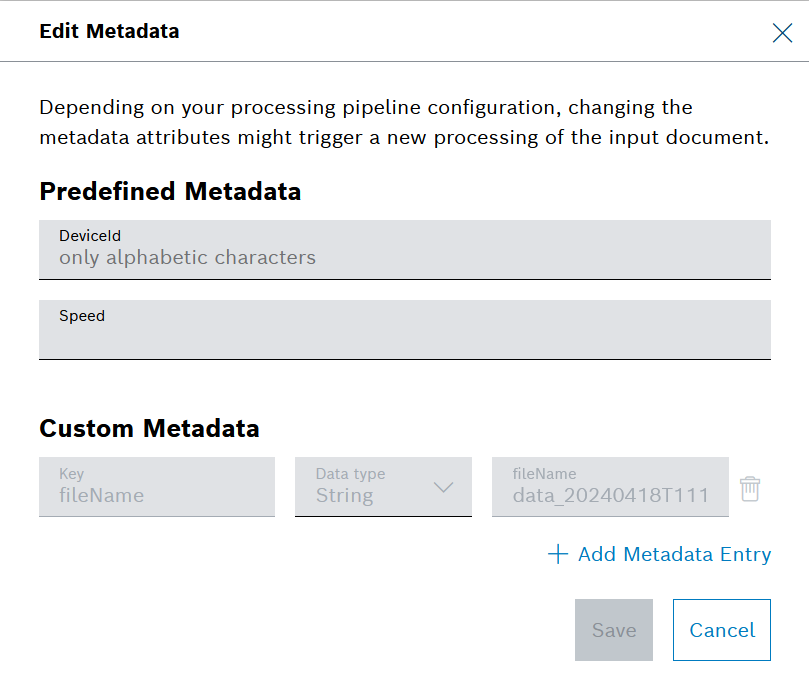
- In this dialog, fulfill any of the following actions depending on your needs:
- Change the values of the Predefined Metadata.
- Change the values of already added Custom Metadata, except for the fileName attribute which is protected.
- Delete Custom Metadata entries.
- Add new Custom Metadata entries.
- Click Save.
→ The changes are reflected in the preview of the input history entry.
→ A new processing of the input document may be triggered, depending on the configuration of the processing pipeline. Refer to Reprocessing the input history.
Showing the processing information
The input history entries can be displayed in the Processing Information tab.
Proceed as follows
- Optionally, set a filter to narrow down the list of input history entries.
- Click the
 Show processing information icon in the line of the input history entry of which the processing information shall be displayed.
→ The entry is displayed in the Processing Information tab.
Downloading input history entries
Individual input history entries, unless archived, can be downloaded.
Archived input history entries can also be downloaded under the following conditions:
- The archived file is already reinstated by a user with the required role, or
- A user with the Admin role or higher has enabled the reinstate "on access" feature, and the user who attempts the download has the required role.
These conditions are described in further details in the section Archiving and reinstating input history entries below.
If you do not have the necessary access rights, the icon is grayed out. Access rights can be managed for each device and for each user role, refer to Managing device access rights.
Proceed as follows
- Optionally, set a filter to narrow down the list of input history entries.
- Click the Download input data icon
 in the line of the input history entry that shall be downloaded.
 Open or save the file to the desired location.
→ The input history entry has been downloaded.
Reprocessing input history entries
A user with the Admin user role can reprocess individual input history entries, refer to Reprocessing the input history.
Archiving and reinstating input history entries
If the project plan allows and the archiving option is enabled by a user with the Admin role or higher, as described in Archiving, here in the Input History UI menu you can archive input history entries larger than 10 kB.
Archived input data entries cannot be downloaded, previewed or reprocessed. However, their metadata can be filtered at and they can be deleted exactly like non-archived entries. You can handle single entries or multiple entries (relies on the filtering).
In order to be read again, the archived files must be reinstated. However, only a user with the Admin role or higher can define which other roles within the project will be allowed to reinstate the archived files. In addition, if a user with the Admin role or higher has activated the reinstate "on access" option (as described in Archiving), the reinstating of the file will happen automatically in the background when a user with the matching role attempts a preview or a download of the archived file. However, such direct preview or download will not be possible if the archived entry has been soft-deleted.
When archived, an entry can be normally reinstated only after 90 days without a cost. If an archived entry is reinstated earlier, this will cause additional costs for the project.
Managing single entries
You can archive an input history entry on its own line on the list. There, you can also reinstate an already archived input history entry, provided that you have the necessary role.

Proceed as follows:
- To archive an entry, click the respective
 archive icon on the right-hand side.
 - On the dialog that opens, mind the warning about potential additional costs and click Confirm.
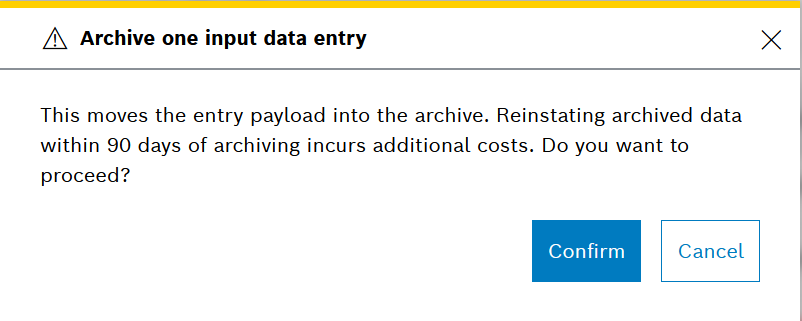
→ When the entry is successfully archived, it is marked with a box next to its byte size.
 If the box icon is grayed out, it means that this entry is soft-deleted, refer to Deleting and restoring input history entries below.
- Hover the mouse over the box icon to check the date and time of the archiving.
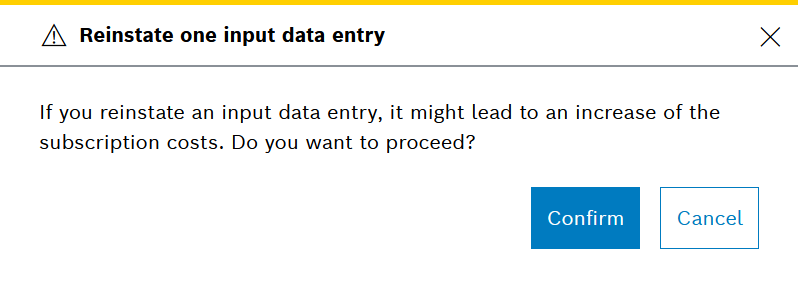
- To reinstate an archived entry, provided that you have the necessary role, click the respective
 reinstate icon on the right-hand side.
When you hover over the icon, you can see the number of days left before the item can be reinstated for free.
- On the dialog that opens, mind the warning about potential additional costs and click Confirm.
Managing multiple entries
It is also possible to archive and reinstate multiple entries at once.
Such archiving of multiple entries is restricted to Admin and higher roles, whereas the reinstating of multiple entries is restricted to the roles, configured by the Admin (as described in Archiving).
Proceed as follows:
- Select a filter in order to avoid the archiving or reinstating of all project entries by mistake.
- Click the corresponding action on top of the list of entries, namely Archive or Reinstate.
- In the dialog that opens, read carefully the respective warning about any potential early reinstatement costs and click Confirm.
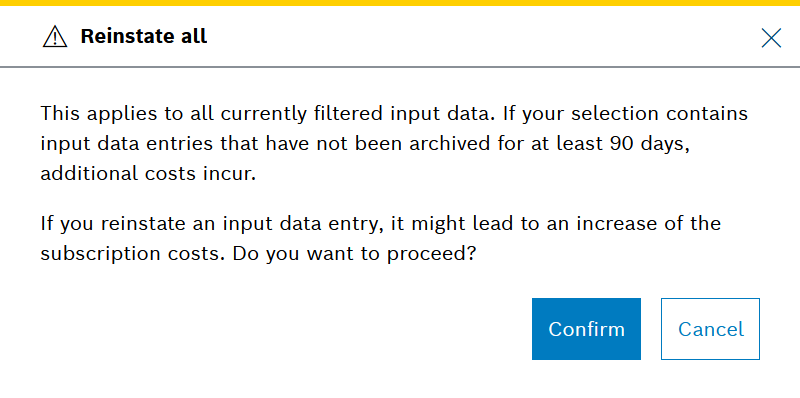
→ The action is applied to all the filtered entries on all pages and not only on the current page.
Deleting and restoring input history entries
A user with the Admin user role can delete individual input history entries and for a limited period of time can also restore them, refer to Deleting the input history.