In Archiving, you can enable and disable the archiving feature on project level, and you can choose between manual and automatic archiving.
You can also configure which roles within the project, in addition to the Admin and higher roles, will be allowed to reinstate archived files, including to reinstate them early. Furthermore, you can allow the direct preview and download of individual archived files "on access", where the reinstatement will happen automatically in the background.
More details about these actions and about the archiving feature itself are described below.
In Input History on the other hand, you can archive and reinstate the relevant input history entries, either one by one or several entries at once. For details, refer to Input History.
About the archiving feature
The archiving of large input data entries (e.g. > 10 kB) allows you to optimize the storage costs for big data which has already been processed and is not needed on a daily basis. Thus their content can be stored in a separate storage system and then only referenced in the database. This ensures support of large files and is counted as raw data.
After the archiving feature has been enabled on project level, the respective input data entries can be moved to a long term archive, which provides a cheaper storage price. The input data will remain archived for at least 90 days and in that period there will be no direct access to it. However, the meta information in the input history will remain queryable.
The reinstatement of the archived data, including its early reinstatement before expiry of the 90-day period of no access, can be configured for specific roles by the project Admin or higher role. For the cases of early reinstatement, the project will incur additional costs. We have added multiple warnings to help you avoid accidental costs related to that.

Our recommendation is to automatically archive input data entries which have not been used or accessed for 100 days or longer, as described below.
Prerequisites
You are assigned to the Admin role or higher and the project is a Premium plan.
Proceed as follows
- Navigate to Admin > Project and open the Archiving tab.
Enabling archiving
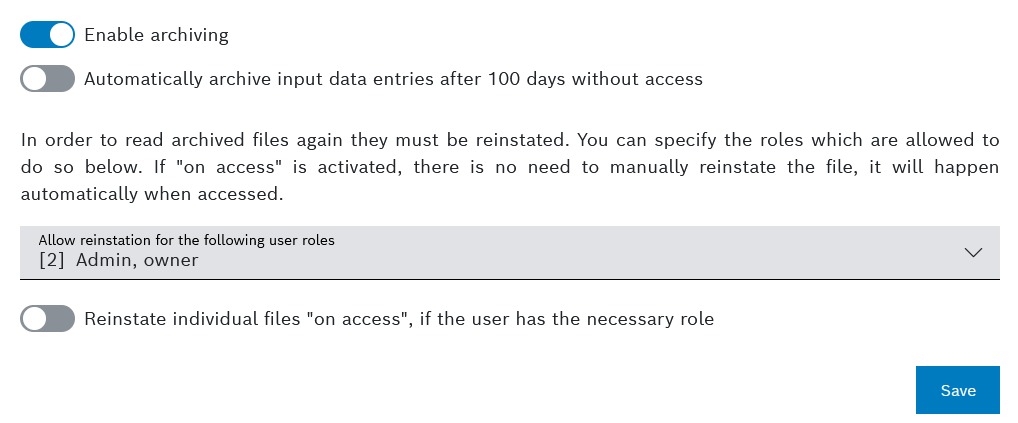
- Click the first toggle called Enable archiving.
→ With this toggle, manual archiving will be enabled. - Optionally, click the second toggle called Automatically archive input data entries after 100 days without access.
→ Automatic archiving will be enabled.
→ If you choose to not enable this toggle, all the files can still be archived manually. - From the drop-down menu called Allow reinstation for the following user roles, select the roles within the project which will be allowed to reinstate already archived files. Be aware, that this includes also rights to cost-generating early reinstating as well.
- Click the toggle called Reinstate individual files "on access", if the user has the necessary role in order to allow direct preview and downloading of the archived files, where the reinstating of the file will happen automatically in the background.
Such reinstating "on access" will not apply for archived files which are soft-deleted.
- Click the Save button.
→ The archiving configuration is applied.
→ If you chose the option Automatically archive input data entries after 100 days without access, you may need to wait up to 24 hours until the input history entries are archived for the first time, since the corresponding job runs every 24 hours.
Disabling archiving
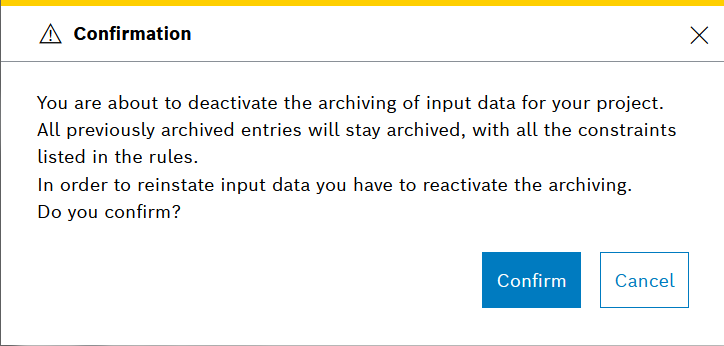
At any time, you can change the archiving configuration and even disable the archiving completely. In such a case, you will be asked for a confirmation and will be informed of the consequences.
Any changes to the archiving configuration will not affect the status of the already archived input history entries. To reinstate such archived entries, you will have to reactivate the archiving feature.
Handling the archiving of input data
For details on how to use this functionality, refer to the corresponding section in Input History.
Checking the archiving statistics
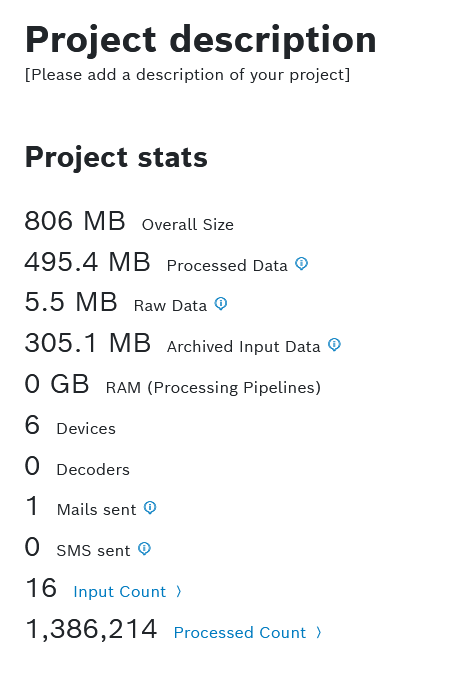
To check the volume of archived data, go to Overview on the left navigation and check the Archived Input Data reported by the Project stats widget, which is pre-configured on the main dashboard.
If such a dashboard is not configured for your project, you can configure one as described in Project Stats widget.
To check the costs related to the already archived data, navigate to Admin > Usage and Estimated Costs and on the Metric field's drop-down list choose Archived Data. For further details, refer to Usage and Estimated Costs.
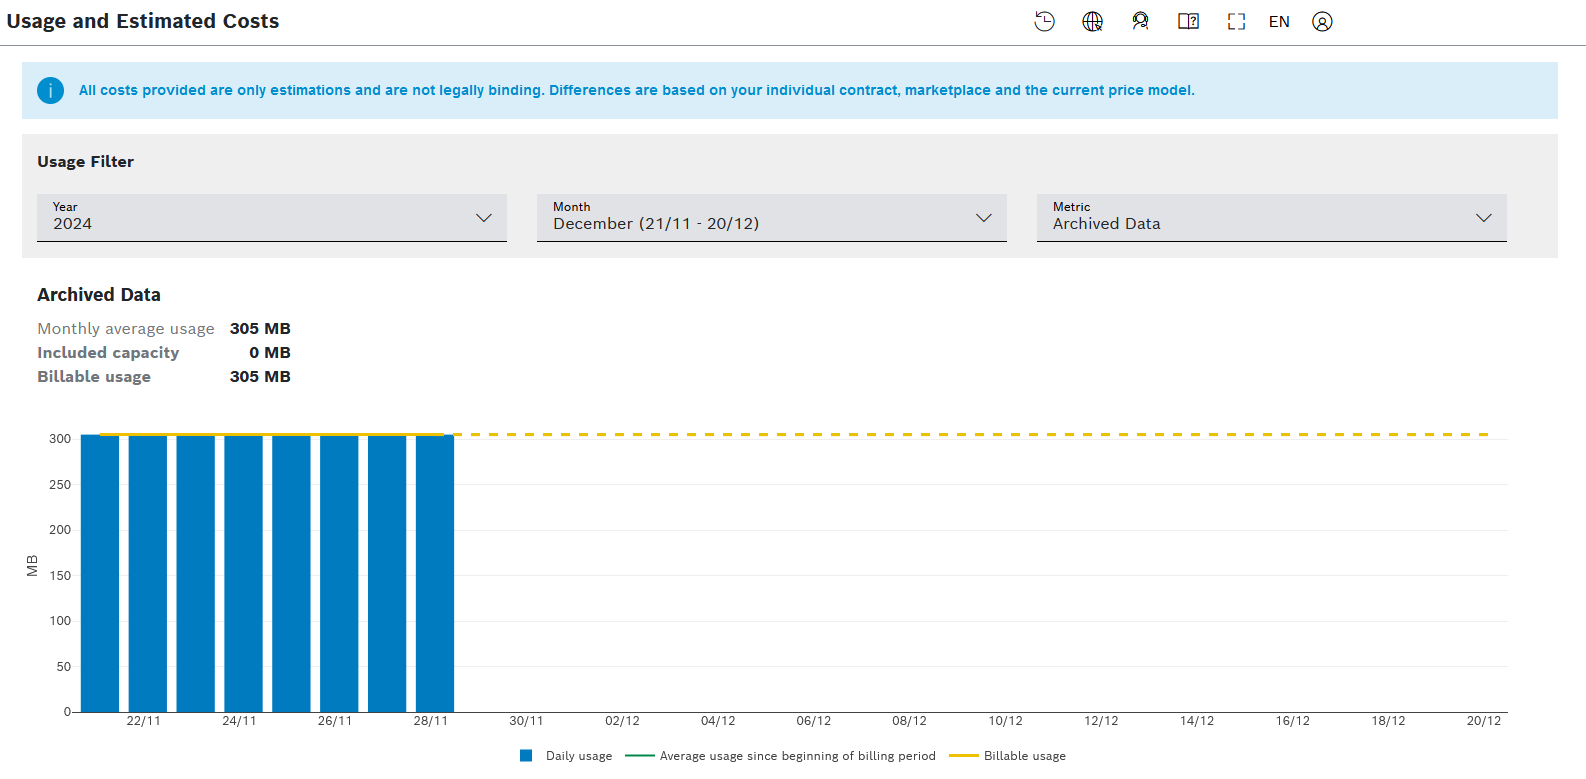
To check the costs related especially to data which has been reinstated early, namely before the expiry of the 90-day period of no access, go to the Metric field's drop-down list and choose the option Early Reinstation of Data.